Churrasco Class Revisited

The Churrasco Class was on Saturday and it was perfect, I had some new students, Judy and Kathy - they were wonderful, thank you for coming. I tried a new idea which was to create a table setting so guests could be more comfortable. This also allowed me to use more linens and create some smaller centerpieces. I filled bowls with the fruits and vegetables that I needed in the class and then asked the guests to pass them to me when I needed them. It was fun and kept them involved. I set each placesetting with a palm tree cookie that I had made for a party that was also happening that day for a friend - the timing could not have been better.

We sipped on pineapple batidas, a fruity drink infused with Cachaça [kah-SHAH-sah]. Cachaça is like rum, but differs as well from rum in that it is made from sugarcane juice while rum is made from either molasses or sugarcane juice then aged in oak barrels.

Guests started out with a simple tomato salad with avocado salsa. The main course was flank steak that had been marinating in chili powder, onions, green peppers, garlic, cumin and lemon juice - which was then grilled and sliced against the grain. This was served with a latin american potato salad which had a vinagarette dressing and included green peppers, jalapenos, eggs and green onions.

Lastly, we finished the meal off with my version of caipirinha [KIE-PEE-REEN-YAH]) pie. A chiffon pie infused with rum and topped with toasted coconut. The caipirinha is Brazil's national coctail. Guests also sampled Guarana Antarctica, a popular Brazilian soda which slightly resembles ginger ale. The large yellow, mylar covered egg is a traditional Easter treat in Brazil according to Malu at Brazilian Connection Specialty Foods in Minnetonka, MN. When unwrapped, it had a faux boix pattern (had to love that) and it had roughly eight wrapped Brazilian chocolate candy treats to try. Check out their website at http://www.brazilianconnectioncompany.com/ or call 952-935-2708 for details.


This class was such a success that I am going to be doing it again for those that were unable to attend.

Cookies for Sophia


I had a request for palm tree and nautilus cookies after the cookie newsletter that went out last week. Sophia is having a birthday party on Saturday. Her only request was that I keep out four cookies and not put any frosting on them as she does not like frosting.
I have been working on perfecting my vanilla-bean sugar cookie recipe to produce a softer cut-out cookie, and I also have been working on my royal icing recipe to give it a little bit more depth in flavor. I am very happy with the results.
The nautilus is flooded with white and then accented with sky blue and teal. The top of the cookie has been dusted with sanding sugar to give it a beach/sand feel. The palm trees are done up to even include coconuts - the trunks are sanded with sugar to give them a textural look.

Roasted Beets in Cream


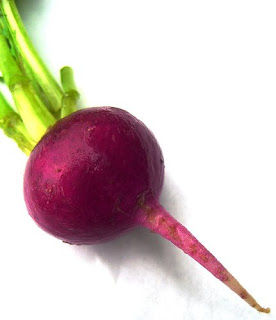
During the Mardi Gras class a couple weeks ago I used beet greens for a recipe, and so I wrapped the roots in wax paper and plastic wrap and put them in the refrigerator for a later use. I realized these were still in there last night - almost a month later. The good news is, beets are root vegetables and so they store well.

The beet is a vegetable that was once considered an herb. In ancient times, beets had elongated roots like carrots. The globular red beet we now eat was only hybridized about 300 years ago. Beets have the highest sugar content of all the vegetables. Beet juice and beet powder are used to flavor carrot, celery, and other vegetable juices, and also to color a variety of foods.

My daughter doesn't like onions, peppers or tomatoes - but she loves beets. So here is what I did - quick and simple, no recipe needed. I do not know the poundage, I had three large beets (baseball size). I also sliced these using my Borner V-Slicer click here to purchase, using the medium slice.

Preheat oven to 425 degrees

Slice beets and layer them in a oven-proof dish. Salt and pepper each layer. Pour 2 cups cream over top of beets and place in oven for 40 minutes. Let stand for five minutes to set, then serve.

Sun-drenched Menu - May 9, 2-5 pm (Warners-Stellian)


Sun-drenched cuisines contribute to our backyard menus. India, where foods are often cooked in a tandoor oven, inspires the appetizer. A middle eastern marinade flavors the pork, and the southwest offers up their contribution to one salad -while the other has Mediterranean flair. Lastly, the menu ends with peach bread pudding infused with Amaretto.

Tandoori Shrimp
Pork Loin with Pomegranate & Orange Glaze
Corn Salad
Tomato Salad with Basil-HoneyVinaigrette
Peach Bread Pudding

Class fee is $40, contact me ross@kon-tent.com for reservations

African Inspired Brunch - May 2, 2-5 pm (Warners-Stellian)


This menu combines the familiar with exotic North African flavors. Much of the preparation can be done in advance, letting you spend time with your guests. Come taste the flavors of Algeria, Egypt, Sudan and Morrocco.

North African Orange Salad
Baked Eggs, Merguez Sausage, Peppers & Tomatoes
Herbed Lemon Marmalade on Toast
Moroccan Pancakes with Almond Cream

Cost of the class is $40, email me ross@kon-tent.com to reserve your spot.

Mediterranean Vegetarian Feast, April 25 - 2-5pm


You do not need a holiday to have a feast. The food inspired here is perfect for family-style serving, with everything passed informally.

Gypsy Spinach Pie
Artichoke Hearts wtih Tomatoes & Currants
Stuffed Eggplant
Asparagus & Potatoes with Almonds & Mint
Citrus & Honey Cheesecake with Nut Crust
Class is $40, email me to reserve your spot - ross@kon-tent.com

Vacation to India Cooking Class


Indian spices enliven the main course and side dishes of the class. This menu can also leave you free to enjoy your company as most of the dishes can be prepared ahead of the event. I have called this class 'for Minnestoans' due to the fact that it is very low on the spice scale to accomodate the Scandanavian palate.

Orange & Ginger Fried Chicken
Saffron Rice
Corn with Chilies & Coconut Milk
Spinach with Peas & Mint
Almond Profiteroles with Banana Mousse & Hot Fudge Sauce

Class size is limited to six and cost is $40.

Minneapolis/St.Paul Magazine Blog Press


So it was thrilling to get a sign that someone in media has taken notice of what I am doing. There is a blurb that Stephanie March, the Food Editor at Minneapolis/St.Paul Magazine did regarding the cooking classes and it a sign that I am on my way. To read the article click here, it is at the bottom of the page. Thank you Stephanie for the kind words and I hope to see you at one of my classes soon!

Huevos Rancheros Waffles


Talk about a tough waffle to contend with. Take a cornmeal waffle topped with black beans, poached eggs and salsa. Then side it up with some avocado and sour cream. This meal makes for breakfast, lunch or dinner. Even my 12 year-old daughter loved this, minus the salsa of course...

Cornmeal Waffles

1 ¾ cup all-purpose flour
1 Tbsp Baking powder
1 tsp Baking soda
1 ½ tsp salt
1 Tbsp granulated sugar
½ cup yellow cornmeal
1 cup water
1 ¾ cup milk
8 Tbsp butter

Combine the flour, baking powder, baking soad, 1 tsp. salt and granulated sugar in a bowl – set aside. In a medium saucepan, combine the cornmeal, water and ½ tsp. salt. Place over medium heat and bring to simmer, stirring constantly. Cook for about five mintues. Once cooked, as the cornmeal is whicked, the mixture will come off the bottom of the pan – then immediately whisk in the milk and butter and pour into the bowl of dry ingredients. Stir well to combine.

Pour into the large mixing bowl with the flour mixture to combine. Then fold in the soft peak, egg whites.

For the Waffles: Pour batter into waffle iron and bake until golden brown. Transfer them onto a rack into an oven that has been preheated to 200 degrees to keep them crisp if necessary.

Feathered Fowl Cookies


An icing technique called feathering is when you make lines with a contrasting color while the main background color is still wet allowing the colors to blend. You then take a toothpick or skewere and drag it through the lines to create the look you see here. I would say that this is the easiest of all decorating techniques, very hard to go wrong here.
These shapes are perfect for any event out on a farm. The Turkey is great for Thanksgiving and the Hen for Easter/Spring.
Perfect for a lot of occasions, please feel free to contact me if interested in ordering. Small to large orders are possible as well as various color combinations. ross@kon-tent.com

Bunny in Egg & Present Cookies


Flocking is a common icing technique where when your icing has settled to a point, but is still has some tack (stickiness) you sprinkle sanding sugar over it.

Sanding sugar is a large grain sugar, there are several sizes depending your needs all the way to what is called rock sugar. Rock sugar is almost the size of a small pea I would say. You can buy sanding sugars in most colors, here I used clear so that the icing color showed through - followed up with pink and white.

The Bunny in the Egg shape is great of course for showers and Easter or Spring occasions, while the present is incredibly versatile - it can be decorated in a myriad of colors as well as designs to fit any party.

Perfect for a lot of occasions, please feel free to contact me if interested in ordering. Small to large orders are possible as well as various color combinations. ross@kon-tent.com

Seahorse & Nautilus Cookies


From the ocean deep comes these two fun cookie ideas for a unique experience. For an event hosted by the water or one where you are serving seafood - they can be made in a myriad of color schemes, various design options are also possible.
Perfect for a lot of occasions, please feel free to contact me if interested in ordering. Small to large orders are possible as well as various color combinations. ross@kon-tent.com

Moon & Star Cookies


Here are two more simple icing techniques, both were flooded with a base color, then allowed to dry. Pink was added as a secondary color on top of both. In the case of the star - that icing was then flocked and after that dried, white was added on top of that.

Perfect for a lot of occasions, please feel free to contact me if interested in ordering. Small to large orders are possible as well as various color combinations. ross@kon-tent.com

Wedding Cookies


A while back I made some wedding cake cookies. These cookies are 6" tall - so not a small treat! I went with tan and white on the cake, and pink and white for the present. Decorating cookies is so much fun, I realize that that sounds demented to some - but I find doing it therapeutic. It completely taps into my creative side, plus people get to eat it.
These are great favors for your guests, and would look classic with a monogram.
I do notice that there is a problem with the edging on the bow of the present, I must have accidentally touched it before it dried. I did not even see that until I was reviewing the photos. This was using the vanilla bean sugar cookie recipe with royal icing to frost, but sparingly and flavored with almond and vanilla.
Perfect for a lot of occasions, please feel free to contact me if interested in ordering. Small to large orders are possible as well as various color combinations. ross@kon-tent.com

Orchid Cookies


My daughter and I were decorating cookies the other day and this was her second cookie she decorated. I'd say she is going to be a pro in no time. What a great cookie for a spring party, shower or little girl's birthday. Pink royal icing covering the cookie with white sanding sugar to make it glisten. I have other orchid shapes as well if you are interested in ordering them - all color combinations are possible too.
Perfect for a lot of occasions, please feel free to contact me if interested in ordering. Small to large orders are possible as well as various color combinations. ross@kon-tent.com

Campfire Themed Birthday Party


I love taking a theme and planning a menu completely around it. I recently hosted a birthday party with a campfire theme inspired menu. Slow roasted, BBQ rubbed pulled pork sandwiches, southern potato salad, blue cheese slaw and refrigerator fire pickles. Notice the invidual s'mores on the stand? Thick layer of milk chocolate above a crunchy layer of homemade graham craker - we topped these off with a big tablespoon of marshmallow cream.

In like a lion, out like a lamb


Do you know the origin of the weather proverb about March, "in like a lion, out like a lamb"? For most locations, the average temperature at the end of the month is higher than at the beginning, so the proverb typically has some meteorological truth to it, but where did it come from?

The phrase apparently has its origins with the constellations Leo, the Lion, and Aries, the ram or lamb. It has to do with the relative positions of these constellations in the sky at the beginning and end of the month

Chocolate Coke - throwback to the 50's


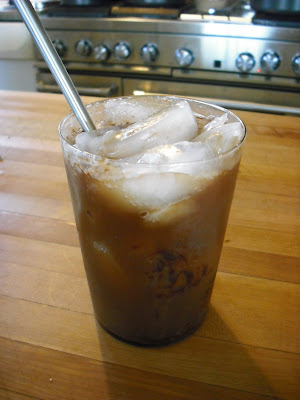
There are a number of ways to make a Chocolate Coke, but there is only one way to make the TRUE Chocolate Coke.Pour about three to five tablespoons of Hershey's Chocolate Syrup in a glass. Pour in ice cold Coke. It is best when the Coke comes from a soda fountain, but as that is not always easy to come across, especially in the average kitchen, canned or bottled Coke will do, as long as it is cold.

If the Coke is not very cold, it will not be perfect. Stir the Coke and chocolate syrup like crazy. Put in a straw and drink. The amount of chocolate can vary. Some people like their Chocolate Cokes more chocolately than others do. A straw is necessary, but burping is optional.

Balloon Clock


Ever since I was a kid, I have been fascinated by key-wound clocks. I love the chiming and the beautiful woodwork. Each piece is a work of art and back 15 years ago, I purchased a balloon clock made by Comitti of London - http://www.comitti.com/ who are still in business today.

A balloon clock is a bracket clock with a waisted or balloon-shaped case. They were made popular in England in the late 18th to the early 19th century. A bracket clock is a style of portable table clock. The term originated with small weight driven clocks (sometimes called 'true bracket clocks') that had to be mounted on a bracket on the wall to allow room for their hanging weights. When spring driven clocks were invented they continued to be made in the bracket style. Often they are composed of two matching pieces created as an ensemble: the clock and its small decorative shelf. They are almost always made of wood, sometimes of ebony, and often ornamented with ormolu \ˈȯr-mə-ˌlü\ mounts, brass inlay, wood or tortoise shell veneer, or decorative varnish. Since in their day clocks were expensive, and a household would not have one in every room, bracket clocks usually had handles to carry them from room to room.
These clocks were almost always repeaters, that is striking clocks which could be made to repeat the striking of the hours at the pull of a lever or cord. This feature was used before artificial illumination to tell what time it was at night. However, because they were often used in bedrooms where the hourly striking of the bell could disturb sleepers, they either had a knob to silence the hourly striking, or did not strike on the hour at all but only at the pull of the cord. These were called 'silent pull repeaters'. It is believed that balloon clock is derived from French styles that are usually of satinwood or mahogany with a convex or flat dial.

Comitti of London have been makers of the finest quality clocks and barometers for over 150 years. I have always wanted one of their barometers, they are instant classics to any home. Many of the styles made in the early days continue to be available today, they are recognised as English classics and sought after as valuable antiques.The company continues to this day as a family-run business designing and making traditional and contemporary pieces. They also offer a bespoke maintenance [custom made] and restoration service for all antique clocks and barometers.

Chicken Pot Pie


At the Blue Plate Special class on Saturday we made individual chicken pot pies. A creamy sauce filled with chicken, pearl onions, celery, chives and fresh thyme. Topped off with a flaky, cheddar cheese crust (note the leaf cutouts as well). This recipe is really versatile, you can switch up the veggies and/or the herbs. Just keep the measurements approximate - you can even do it with beef. Truly a comfort food.

Chicken Pot Pie with Cheddar Crust

Cheddar Crust

2 cups all-purpose flour
¾ cup chilled, unsalted butter
1 cup shredded cheddar cheese
½ cup ice water

In a food processor, place the flour and butter. Pulse until combined and crumbled, and then add the cheese until just blended. Add water until the mixture resembles cornmeal and when holds when pressed together. Roll between two silpats and place in refrigerator until needed.

Filling
2 ¼ cup chicken stock
2 ½ tsp. salt
1 Tbsp chicken demi-glace (optional)
2 ½ lbs. boneless chicken
2 ½ cups baby carrots
1 bag frozen pearl onions
3 stalks celery, thickly sliced
1 cup peas
6 Tbsp unsalted butter
7 Tbsp all-purpose flour
1 cup heavy cream
1 tsp thyme
3 Tbsp chives
3 Tbsp parsley
Salt and Pepper to taste
1 egg, beaten

Preheat an oven to 400 degrees

In a saucepan bring the stock to a simmer and add the chicken, carrots, onions, celery and peas. Cook uncovered until chicken is opaque, 15-20 minutes. Remove the chicken from the stock and let cool. Cut the chicken into cubes or shred with a fork. Pour stock mixture through sieve from one pot into another to remove vegetables. Set vegetables aside.

In another saucepan over medium heat, melt the butter. Sprinkle in the flour and whisk until the mixture is bubbling – do not brown. Add stock gradually, whisking constantly and bring to simmer. Cook mixture for 4-5 minutes, until thickened. Add the cream. Remove from the heat and add the thyme, chives and parsley. Add salt and pepper to taste. Stir the chicken and vegetables into the sauce. Spoon mixture into a baking dish and brush the edge with the egg mixture.

Remove the pastry from the refrigerator and trim edges to fit the pan. Using remaining pastry, cut out leaf shapes if desired for decoration. Place pastry on top of baking dish and press down around edge to seal pastry to egg wash on dish. Then brush top of pastry with egg wash and follow up by putting leaf shapes over that and brushing those with additional egg wash. Cut several slits in the top of the pastry to allow steam to release.

Bake until golden, 25-30 minutes. Remove from the oven and let stand for 5 minutes, then spoon into bowls to serve.

Cinnamon Bun Waffles

The smell of cinnamon, the addition of pecans - all drizzled with a vanilla glaze. Is this truly breakfast or am I dreaming? Toasty Cinnamon Bun waffles are a great addition to anyone's morning and why not try a new take on the beloved cinnamon roll - only without the rolling pin and hours of preparation.

Correspondence - a lost art


I recieved a 'Thank you' letter in the mail today from my friend Ginny and it made me take the time to think about how receiving actual written letters is almost a lost art these days. Most correspondence is typed and sent, emailed or in my daughter's case - text messaged. With all of the technology around us, we have lost a sense of connection that comes with getting a letter that someone sat down and physically wrote. Remember when penmanship was something we practiced? I used to do calligraphy - I wonder if that dates me? I know I have a friend Dani who does beautiful calligraphy, she actually gets paid to write things for people - imagine that! I know life is busy, I myself am an email hound - I guess I am reminded that I need to sit down and slow the pace to take the time to hand write a letter, no matter how brief to show someone that they matter and that I was thinking of them. Reconnecting with one someone, these are the things that truly matter - not how many G's our cell phone has. I recently recieved my grandmother's recipe box and to see her handwritten recipes brings back so many fantastic memories.

Thank you Ginny for inspiring me to take the time, I hope this article inspires you to inspire someone as well as maybe yourself...

Faux Bois [foh-bwah] Cookies


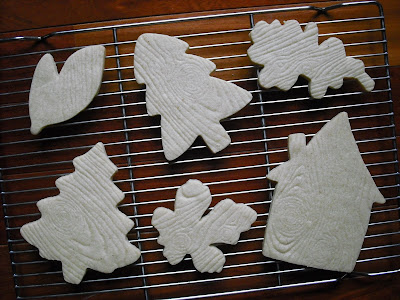
I was testing out a new sugar cookie recipe that was infused with nutmeg. The smell of nutmeg is comforting and the wood-looking exterior of nutmeg inspired me. I ran across pottery mats that imprint a design onto clay which I transferred onto cookie dough. One of the mats had a wood grain on it, which feeds my appreciation for all things faux bois. I decided to use cutters that would be reminiscent of wood, i.e. leaves, trees and the house. I get thrown back to every time I see faux bois as I think it may make me nostalgic about the faux wood-grain paneling my father installed around our home becuase wallpaper was too expensive. Either way, the effect it made on the cookies lends a touch of sophistication without the hit to your wallet.  Here is used my Vanilla-Bean Sugar cookie recipe

Faux Bois [foh-bwah] Rug


I found this fantastic faux bois outdoor rug at Pottery Barn. I use this as an indoor rug just inside the entrance door to my home. I love how it evokes the feel of country and the natural fibers are so great at picking up and catching dirt so I do not have to clean my floors so often. My obsession with false wood continues....

Ironing 101 - cloth napkins

Now I know some people say ironing is a chore, I would tend to disagree. I find ironing to be relaxing and my perspective is it is all in how you do the task that makes a difference in how you perceive it. I recently entertained for forty people and decided I would show you how to iron properly. For today, I am going to discuss with you how to iron your cloth napkins and keep them looking like they do in the store (or as close to it).Cloth napkins are a great way to dress up a table for any occasion. Whenever I launder them, I always first check them for any unnerving stains and spot treat those with shout or if the linens are white, I have bleach with water (50/50 blend) in a spray bottle that I only spray direct on the spot. I always wash linens on cold, except for linens that are completely white (which are done in hot) - but then use a cold rinse. If you think you have some difficult stains, you can try using warm, but then a cold rinse.

Once they are done in the washer, you can either begin the ironing process then or you can throw them into a plastic garbage bag to keep them damp (up to 48 hours). If I do not have any other laundry to do and know I will have time to iron them in the next 48 hours, I will keep the linens in my washer to keep damp. Do not do this for an extended period of time or your linens will then need to be laundered again. Otherwise you can pull them out - DO NOT PUT THEM IN THE DRYER... EVER! If you are not going to have time for a while, then pull them out and let them air dry until you are ready to iron them.


I placed these dry linens into a laundry basket and poured one small glass of cold water (one at a time) over them until they were damp. I then let them sit for 15 minutes before I started to iron them to make sure they were all wet. I also always have a spray bottle filled with water to use whenever the linens are dry. You want a damp linen when you are ironing so you achieve that crisp look to your linen.The workhorse, my Rowenta Pressure Steam Iron. I have to start this iron seven minutes before I can use it due to the large water holding tank that generates the steam. This thing doesn't quit, it can go for hours. You can see the damp linen to the right.


Now I begin to iron the damp napkin. You should have steam coming off the linen and you sometimes on darker linens will notice the color lighten as the water/steam evaporate from it.

Here I have done half the napkin, you can see the color change. Once you are done with the entire linen, you then fold it in half, and iron over the entire half. You will still most likely have some steam arising, that is good because it allows for good creases.


Then you fold the napkin over itself again so it resembles a long strip and you iron over that again.
Lastly, you fold that strip in half over itself so you can see the edges/corners and finally iron over that. By doing this, you will add years of life to your napkins and make many table settings and events more special.

Old, made new


Several years ago I came into an old pie safe that was owned by a friend's grandmother. I had this in storage for years until my recent move to the farm which led me to limited cupboard space. I soon realized that I could reinvent this pie safe into a pantry for my dinnerware. It lends charm to the space and is an unexpected storage facility for dishes that are needed, sine the dining table is situated right there. Platters and serving pieces are stored below for accessibility as well. I believe the pie safe adds a vintage feel to my decor.
In our current world state, it's a good time to look around and find ways to recycle what you have and give it a fresh, new use in an alternative location - or even painting an object, you never know what you have until you open up your mind to new ideas!

Sugar-Crusted Brownies

(Makes two dozen)

½ pound (2 sticks) unsalted butter, plus extra for muffin tins
1 cup sugar, plus extra for muffin tins
6 ounces semisweet chocolate, chopped
3 ounces unsweetened chocolate, chopped
3 large eggs
1 tbsp vanilla
½ cup all-purpose flour
1 tsp baking powder
½ tsp salt

Brush the inside of the cups of a standard muffin tin with melted butter. Spoon about 1 tbsp of sugar into each of the greased cups and shake and tap around to cover the bottom and sides of the cups completely with a thick coat of sugar. Tap out any excess sugar.

Preheat oven to 350 degrees.

Combine the butter, semisweet chocolate and unsweetened chocolate together in a small pan and heat until melted and combined. Remove from the heat and set aside.

In a large bowl mix together the eggs, sugar and vanilla until combined. Stir in the chocolate mixture and then slowly add the flour, baking powder and salt until combined.

Spoon about ¼ cup of the batter into each of the muffin cups. If you run out of batter, make sure to wipe out the empty cups or you will have a mess.

Bake until the tops are firm and toothpick comes out clean from the center 20-25 minutes. Be careful not to over bake. Transfer to a wire rack to let cool enough to handle. Run a think, sharp knife around the edge of each brownie and then carefully tip it out and catch it in your hand. Place the brownies on a wire rack to cool slightly. Enjoy!

Glassware - Asli

I believe glassware is an essential part of entertaining. I am a firm believer in mixing or matching - depending on the occasion. Getting asked regularly where I got the glasses is a common occurrence, and so I wanted to begin to talk about how to build your glassware pantry. Glassware can be a fairly inexpensive way to dress up your table or set a mood. Collecting what you enjoy and catches your eye is what is most important (as well as scoping out good deals). I am always checking sale tables and website for online sales. I purchased this glassware several years ago because I thought the bowls were reminiscent of Venetian glass. I knew I could use these for a formal dinner or just to make a casual get together for some good wine more elegant by just using a beautiful piece of stemware. It really is all in the details.

Heirloom Recipe Box

Sometimes life just gives you a 'high five' out of nowhere to show you that you are moving down the right path. I stopped over to visit my mother yesterday and she had found my grandmother's recipe box, which was filled to the brim with all the goodies I used to stand beside her and help to make. My grandmother Ellen is who taught me the joy of cooking. E, as I called her, was amazing in the kitchen, garden and home. I owe her for teaching me so many fantastic skills and she still brings a smile to my face whenever I think of her. Seeing the plastic jugs that flanked the top of the box brings me back to so many memories. E did not have much money, and I recall her always placing (with careful perfection) three chocolate chips on top of every one of her chocolate chip cookies.

As you can probably imagine, I was dumbfounded when my mother handed this to me. I could not wait to get home and rummage through this treasure chest and begin to imagine the amazing dishes I could prepare. It has inspired me to create a column in my blog called Heirlooms, recipes that stand the test of time.

I believe in light of where our world is at, it is time to get back to basics, and not worry so much about how to plate a dish - but how to put something in that dish period, something soothing that comforts the soul. I've never been terribly impressed by a $20 appetizer consisting of four shrimp topped one another drizzled with lime reduction and lychee syrup. Don't get me wrong, dishes like this are great from time to time - but for me it always comes back to the community food brings, the conversation and respite from the day. Time to sit together and enjoy a good meal. I look forward to sharing these recipes from you and welcome you to submit any that you have for me to test and try. I will certainly share those that are hits with your permission of course!

Beignets [ben-yeyz]

A staple of New Orleans cuisine, fried sweet dough covered in powdered sugar. Cafe du Monde is the place to get these are your sweet tooth is harassing you in the Big Easy. I made these for the Mardi Gras cooking class this last weekend. Who doesn't love fried dough? Don't forget to buy a can of condensed milk before you set on your journey with this easy to make yeast dough - fry in fresh peanut oil as well to get the full flavor, and tons of powdered sugar....